Summary
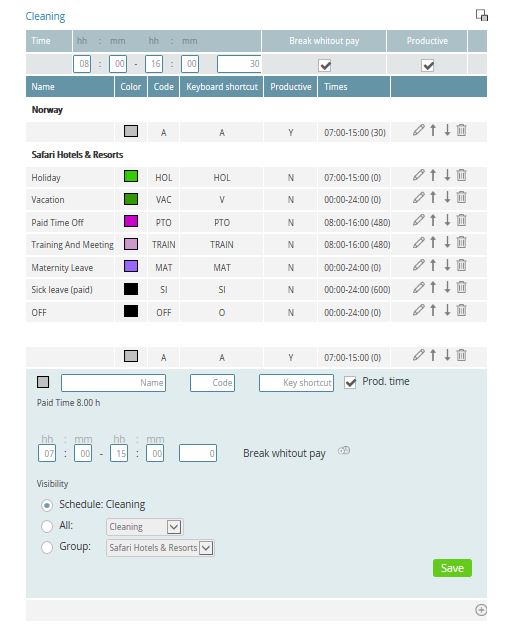
This summary will help you to understand how to work with predefined shift codes and how to build or maintain shift codes.
Intended Users
Cockpit Owners
Instructions

- Open the shift codes by clicking on the Shift Codes tab in Tools menu.
- If one or more persons are already in another schedule and/or department, the schedule for those departments will show as well. Click on the department you want to edit the codes for.
- The table shows all available shift codes that are currently inserted in this schedule, as well as unproductive shifts (e.g. paid sick-leave) that are predefined. A shift code can be added, revised or removed.
- To delete a shift code, click on the trash bin icon next to the shift.
- To revise a shift code, click on the pen icon next to the shift.
- To add a new code, click on the green + sign located in the right lower corner. You will need to insert information for the new shift code.
- Description of code.
- Enter the text you would like the shift code to be presented with in the actual schedule.
- Insert a keyboard shortcut (this should be as short as possible, ideally one character as it is quicker to work within the schedule).
- Unproductive shifts (e.g. paid absence) should be predefined. If you need more unproductive codes, please check with a PMI super user at the property or d2o support (support@d2o.biz).
- Insert start time of shift.
- Insert end time of shift.
- Add breaks that are not paid (this means it is deducted from total working time) in minutes.
- You may add a color for this code; click on the square for options.
- If this is a split shift, click on the clock icon with a + sign and define pt. 3e, 3f and 3g for the second shift.
- Remember to add this new code into the database by clicking on the double arrow.